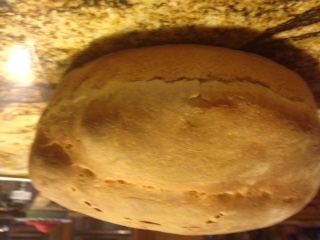
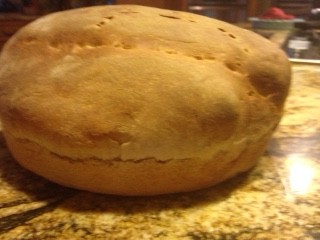
Sourdough bread made with live starter
Why this is the only bread I will eat!
Loving my Sourdough starter

I received a sourdough starter from my teacher at Sage Herbal School in Colorado Springs and I made my first loaf of bread. I normally do not eat bread but I had to try this. Research shows that even those with celiac disease can eat bread made with gluten containing flour and sourdough starter with no damage to their microvilli. See the study here. What they found is that fermentation of the wheat flour with the sourdough lactobacilli and fugal proteases decreases the concentration of gluten in the bread here
My son has a delayed gluten allergy. So naturally I am excited to see if this bread works for him. Typically his response to ingesting gluten is acid reflux and a burn in his throat, along with excess mucus production. I just gave the first loaf to him so now we wait and see the results. I will update this when we find out if he can tolerate the sourdough bread or not. (You can use a whole wheat flour-actually any flour as long as it is not a sprouted grain. ) I also have made pizza dough using the recipe below.
What I like also about the bread is that is does not have an overly sour taste as some sourdough breads do that you buy in the grocery store.
Keep in mind that this homemade bread made with the starter is not the same as the bread you purchase in your local grocery store. I am also not saying all of those with celiac can eat this bread but instead you should do some research and decide for yourself to try it or not and see how you feel. You know your body best.
Benefits to eating bread made with a live sourdough starter
When you bake the bread with a living starter it will continue to provide you with probiotics in a nutritious and digestible form. Look to get a starter from someone you know. Then you can share your starter with others too.
I currently have one starter that I am giving away but should have more to give away within a week or two. If you want a sourdough starter you will need to email me and arrange for time to pick it up along with directions for bread that I will email to you. This will be on a first come/first serve basis.
Sour dough Bread Recipe Using a live starter
Your Sourdough starter
Feeding: you need to always use equal portions in a 1:1:1 ratio. You can use less sourdough starter but no more than a ½ c. as it gets too active and will eat all the food and will not be bubbly. Do not use more starter than ingredients.
To your sourdough starter, add ½ c. flour and ½ c. water. Stir until well combined and seal with a lid. Let it sit on your counter for 8-12 hours or until bubbly. This can take a day or two. If you are not using it to bake with right away, you can then place it in the fridge and feed it once per week. (if you have a cup of sourdough starter then add one cup flour and one cup water to it-always same amount or more flour and water than starter when “feeding” it)
The starter that is left in your jar should be fed once per week. Even if you have only a few spoonful’s left of starter in your jar, still add ½ flour and ½ water to it each week, let it ferment on counter and then put back in your fridge.
When it sits in your fridge and you are not using it-still feed it once per week. Add in flour and water (always same amount or more flour and water than the starter)
When in your fridge the alcohol may separate and come to the surface. This is called hooch and can be dark in color. It is harmless and you can either discard it or blend it back in. This hooch is a by -product of the starter eating all the food.
Ingredients
- 1 c. of starter
- 1 c. warm water
- ¼ c. oil
- ¼ c. honey
- 4 c. flour
- 2 t. salt (don’t add right away)
Directions
- If using mixer, process until all ingredients, except the salt, are mixed together. If mixing by hand, stir until just mixed.
- Let the dough rest for 10 minutes. This resting allows the gluten strands to absorb the water and start to develop. It is a very important step for the right consistency for your dough.
- After the ten minutes are up, sprinkle in the salt. Then turn on your mixer or mix by hand for 3 minutes.
- Leave the dough in the mixing machine or bowl and put a cover on it. Let the dough sit in the bowl for 5 hours at room temperature (70 degrees)
- After the 5 hours, the dough should have doubled and is moist and sticky. Stir the dough a couple times. Pour the dough out onto a lightly floured surface.
- Fold the edges to the middle all around. This helps to shape the dough. Knead the dough into a ball shape.
- Put your dough into a glass or ceramic baking dish or pie dish and sprinkle with a bit of flour then cover with a damp cloth.
- Allow the dough to proof for 2.5 hours or until doubled.
- Preheat your oven to 450 degrees. Cut some slits into the dough and bake at 450 for 5 minutes. After the five minutes, turn the oven to 425 and bake for 25 more minutes.
- Cool on wire rack and enjoy!
If you want a starter and live in the Castle Rock, CO area and want to pick one up for free then contact Karen, Tru Foods at 303-522-0381.
Karen with Tru Foods Nutrition is a certified nutrition consultant who gets to the root causes of your health conditions with nutrition, herbs and supplements. Visit her website www.trufoodsnutrition.com for more information.
Leave A Comment
You must be logged in to post a comment.